Contents
Happy Friday!
So you’re here looking for crochet patterns that little boys may enjoy right? Well what do most little boys absolutely LOVE?
(And no, it isn’t “getting dirty” although that is probably both of my boys’ favorite thing. It just doesn’t translate well into a crochet pattern)
ANIMALS!
So for the entire month of September, it’s animal month here at Boy Mom Crochet Life! There will be some oldies (but goodies!), the standbys that you can’t go wrong with, as well as at least one that you don’t see too often, but is just too cute not to share!
Now, for the first week of animal month, I bring you a classic child favorite: the dinosaur!
Some of the links in this article are “affiliate links”, a link with a special tracking code. This means if you click on an affiliate link and purchase the item, I will receive an affiliate commission- as an Amazon Associate, I earn from qualifying purchases. The price of the item is the same whether it is an affiliate link or not. Regardless, I only recommend products or services I believe will add value to you. I hope these links are as helpful as possible for you!

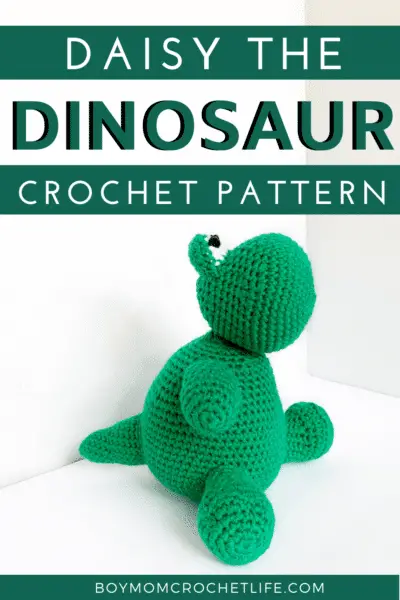
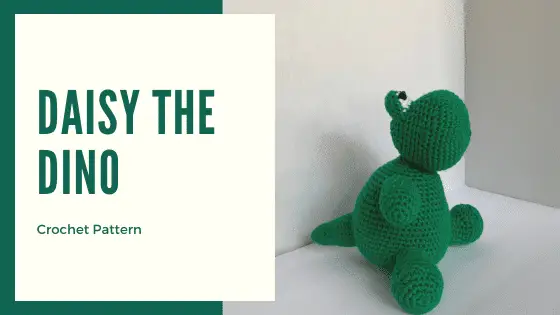
The entire time I made this dinosaur, I referred to it as a boy (just to myself). But as soon as it was finished, my oldest’s usual name for things just seemed to fit. Thus I give you Daisy the Dinosaur!
(Daisy is one of our dog’s name and due to her super sweet nature even though she’s a giant lab, it really seemed to fit with this sweet dinosaur)
Daisy (the dinosaur) has been a big hit with the boys, especially B, who loves to pretend she’s eating my face. Such is life with a toddler, right? (Although I feel like I should add here that Daisy the dog is also a big hit with the boys- she’s definitely the favorite dog of all the dogs they know, which is a lot!)
If you’re looking for a free crochet pattern that you could likely get done in a weekend and that doesn’t require too much yarn, this would be it! I used mostly one color for all of the body parts and used just under half a skein of Hobby Lobby’s I Love This Yarn.
The white and black yarn amounts are so small, that you may even have scrap amounts that size. And if your little is big enough that you would elect to use safety eyes rather than embroidering eyes, you could get away with using only green (or whatever major color you choose) for the whole project!
Well that’s enough talk; let’s get to the pattern!
Daisy the Dinosaur Crochet Pattern
Skill Level
Easy
Yarn and Hook Size
168.5 yards A) I Love This Yarn in Jelly Bean (355 y/324.6 m per 7 oz/198.5 g skein); 100% acrylic, worsted weight (4) yarn
1.5 yards B) I Love This Yarn in White (355 y/324.6 m per 7 oz/198.5 g skein); 100% acrylic, worsted weight (4) yarn
1.5 yards C) I Love This Yarn in Black (355 y/324.6 m per 7 oz/198.5 g skein); 100% acrylic, worsted weight (4) yarn
Notions
Tapestry needle Scissors Stitch marke rFiber fill - Eye solution of choice: safety eyes, embroidered eyes or crocheted eyes
Measurements and Gauge
8.5 stitches by 8 rows is 2 inches. Finished measurements are 9 inches tall by 8 inches wide by 9 inches deep.
Abbreviations
| ch(s) chain(s) | rd round |
| dec decrease | sc single crochet |
| inc increase | sl st slip stitch |
| MR magic ring | st(s) stitch(es) |
| rep repeat |
() denote a group of stitches worked in the same stitch
[] denote a group of stitches that repeats as many times as directed
{} denote a group of stitches that repeats as many times as
directed
Instructions
Use a stitch marker to mark the first stitch of each round on each piece.
Head
Use A
Rd 1: create MR, ch 1, sc 6 (6)
Rd 2: [inc], rep [] five more times (12)
Rd 3: [sc, inc], rep [] five more times (18)
Rd 4: [sc 2, inc], rep [] five more times (24)
Rd 5: [sc 3, inc], rep [] five more times (30)
Rd 6: [sc 4, inc], rep [] five more times (36)
Rd 7: [sc 5, inc], rep [] five more times (42)
Rd 8: [sc 6, inc], rep [] five more times (48)
Rds 9-11: sc 48 (48)
Rd 12: sc 1, [dec, sc 1, dec], sc 17, dec, sc 17, rep [], sc 1 (43)
Rd 13: [sc 5, dec], rep [], sc 7, dec, sc 7, sc 4, dec, rep [] (38)
Rd 14: [sc 4, dec], rep [], {sc 5, dec}, rep {}, sc 1, sc 3, dec, rep [] (32)
Rds 15-17: sc 32 (32)
Rd 18: sc 14, dec, sc 2, dec, sc 12 (30)
Rd 19: [sc 3, dec], rep [] five more times (24)
Stuff with fiber fill
Rd 20: [sc 2, dec], rep [] five more times (18)
Rd 21: [sc, dec], rep [] five more times (12)
Add any more fiber fill necessary
Rd 22: dec 6 (6)
Fasten off and use the tail to sew through each stitch and pull closed. Weave in end.
Eye Bulge
Using A, ch 7
Rd 1: sc 5 in back bumps of ch, (sc 2) in final bump, sc 5 in opposite side of foundation ch, (sc 2) in final ch (14)
Rd 2: [sc 2, inc], rep [], sc 1, Using B: [sc 2, inc], rep [], Using A: sc 1 (18)
Rds 3 & 4: Using A: sc 9, Using B: sc 8, Using A: sc 1 (18) If using safety eyes, attach in third row on the second and seventh white stitches
Rd 5: Using A: sc 9
Fasten off. You want the back side to be longer than the front side so the eye bulge sits correctly on the head, so Rd 5 is only a half row.
Body

Use A
Rd 1: Create MR, ch 1, sc 6 (6)
Rd 2: [inc], rep [] five more times (12)
Rd 3: [sc, inc], rep [] five more times (18)
Rd 4: [sc 2, inc], rep [] five more times (24)
Rd 5: [sc 3, inc], rep [] five more times (30)
Rd 6: [sc 4, inc], rep [] five more times (36)
Rd 7: [sc 5, inc], rep [] five more times (42)
Rd 8: [sc 6, inc], rep [] five more times (48)
Rd 9: [sc 7, inc], rep [] five more times (54)
Rd 10: [sc 8, inc], rep [] five more times (60)
Rds 11-16: sc 60 (60)
Rds 17-20: sc 60 (60)
Rd 21: [sc 8, dec], rep [] five more times (54)
Rd 22: [sc 7, dec], rep [] five more times (48)
Rd 23: [sc 6, dec], rep [] five more times (42)
Rd 24: [sc 5, dec], rep [] five more times (36)
Rds 25 and 26: sc 36 (36)
Rd 27: [sc 4, dec], rep [] five more times (30)
Rd 28: [sc 3, dec], rep [] five more times (24)
Rds 29 and 30: sc 24 (24)
Stuff with fiber fill, adding more as necessary
Rd 31: [sc 2, dec], rep [] five more times (18)
Rd 32: [sc, dec], rep [] five more times (12)
Fasten off and leave a 12” tail to sew head on. Add any more fiber fill necessary.
Arms
Make 2
Use A
Rd 1: Create MR, ch 1, sc 6 (6)
Rd 2: [inc], rep [] five more times (12)
Rd 3: [sc, inc], rep [] five more times (18)
Rds 4-6: sc 18 (18)
Rd 7: [sc, dec], rep [] five more times (12)
Rds 8-12: sc 12 (12)
Fasten off, leaving an 8-10 inch tail to sew onto body. Stuff with fiber fill
Legs

Make 2
Use A
Rd 1: Create MR, ch 1, sc 6 (6)
Rd 2: [inc], rep [] five more times (12)
Rd 3: [sc, inc], rep [] five more times (18)
Rd 4: [sc 2, inc], rep [] five more times (24)
Rd 5: sc 2, [inc 2, sl st 2], rep [], inc 2, sc 6, dec, sc 4 (29)

Rd 6: sc 6, sl st 2, sc 4, sl st 2, sc 9, dec, sc 4 (28)

Rd 7: in blo, sc 28 (28)
Rd 8: sc 4, dec, [sc 3, dec], rep [], sc 12 (25)
Rd 9: [sc 3, dec], {sc, dec}, sc 2, dec, rep {}, rep [], sc 5 (20)
Rd 10: [sc 2, dec], {sc, dec}, rep {} two more times, rep [], sc 3 (15)
Rds 11-14: sc 15
Fasten off, leaving an approximately 12 inch tail to sew onto body. Stuff with fiber fill.
Tail
Use A
Rd 1: Create MR, ch 1, sc 6 (6)
Rd 2: sc 6 (6)
Rd 3: inc 6 (12)
Rds 4-8: sc 12 (12)
Rd 9: [sc, inc], rep [] five more times (18)
Rds 10-14: sc 18 (18)
Fasten off, leaving a 10-12 inch tail. Stuff with fiber fill
Assembly
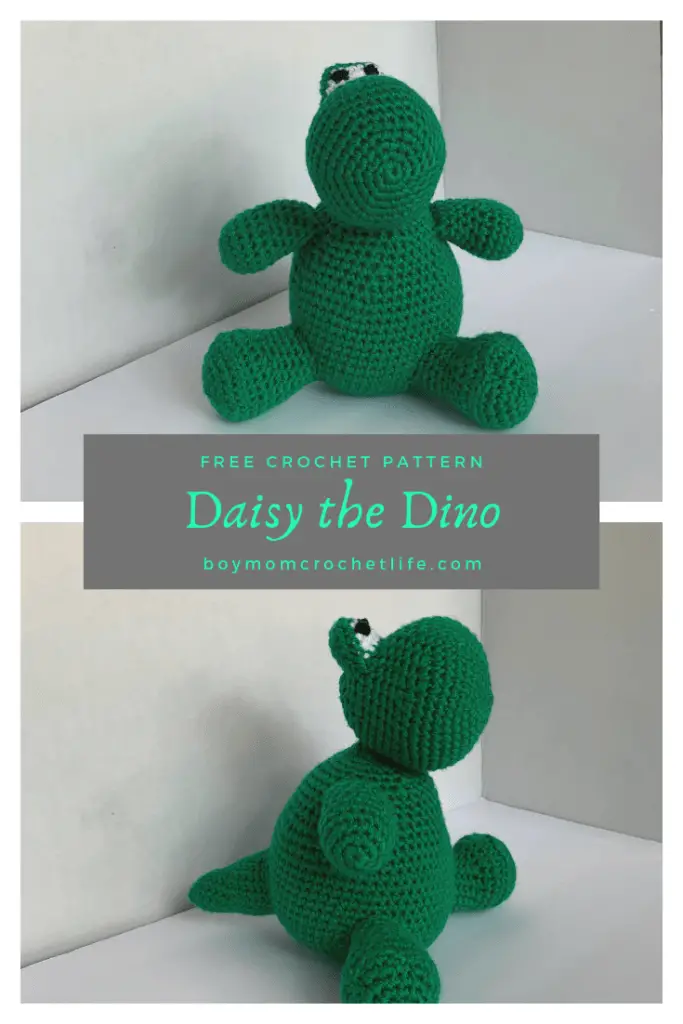
First, stuff eye bulge with some fiber fill and sew to head, attaching on fourth and eighth rows. Weave in remaining end.
Next, sew head to body using tail from body and weave in remaining end.
Sew ends of arms together, then sew arms to body on sixth row from the top. Weave in remaining ends.
Choose the positioning of your legs and sew onto body, weaving in remaining ends.
Lastly, sew the tail onto the back of your dinosaur and weave in the end.
If not using safety eyes, embroider the eyes in the third row of the eye bulge (second row of white) over the second and seventh sts. I used color C and stitched several times around the sts, tied off and poked the knot into the piece.

An additional option is to choose the crocheted eye of your choice.
And now you have an adorable dinosaur toy for a little boy or girl in your life! As always, if you make something with this pattern, I would absolutely love to see it! You can find me on Instagram, Facebook, Pinterest, or leave a comment here or shoot me an email. I look forward to seeing your masterpieces!
Pin it for later!