Contents
What’s this today- a crochet gopher?! Yep! Read on for some interesting gopher facts before we get to the crochet pattern!
This is the second pattern in the Woodland Animals crochet series. Head to that link to check out the other crocheted cuties!
Did you know that gophers’ full name is actually “pocket gophers”? They are called pocket gophers because they have external fur lined pockets from their cheeks to their shoulders to carry extra food (source).
Who wouldn’t love to have some natural pockets to carry stuff? I’m always caught without pockets!
I also didn’t realize how small gophers actually are, around 5 to 14 inches.
I guess I shouldn’t rely on Winnie the Pooh for factual accuracy when it comes to… well, pretty much anything.
But that means that this cute little girl I have to share with you today is actually almost life-sized!
Which in this case means she could fit in your pocket- but not an actual gopher’s pocket. I mean, if you have any (pockets, not gophers).
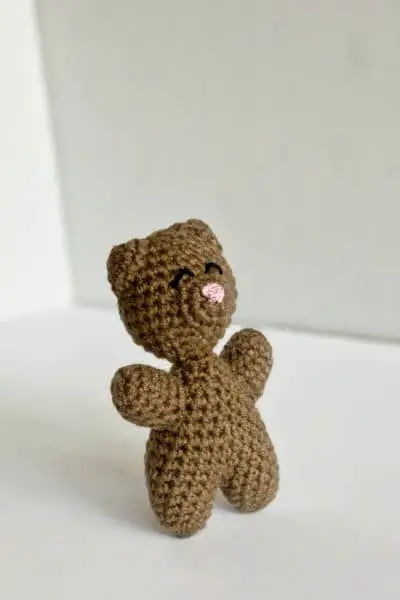
This is the second animal in my Woodland Critters series! Gina the Gopher!
She is a pretty quick make and doesn’t require too much sewing/seaming, which I love because it means there’s more time for crocheting!
Gopher Crochet Pattern
Some of the links in this article are “affiliate links”, a link with a special tracking code. This means if you click on an affiliate link and purchase the item, I will receive an affiliate commission. The price of the item is the same whether it is an affiliate link or not. Regardless, I only recommend products or services I believe will add value to you. I hope these links are as helpful as possible for you!
I used about 45 yards of Red Heart Super Saver in Café Latte for this girl because I thought it was a pretty good match to gophers’ actual coloring and a 4.5 mm crochet hook.
And this is the only color of yarn you will need, so not only is this a quick project, it’s also less than one skein! Score!
I did use some Coats and Clark embroidery thread for the nose in pink and eyes in black (less than 1 yard for each) and a 2.0 mm crochet hook for the nose.
If you have safety eyes/noses, those would also work well (as long as it’s not for someone under 3).
Other things you’ll need:
- Tapestry needle
- Stitch marker (you only really need one!)
- Scissors
- Fiber fill
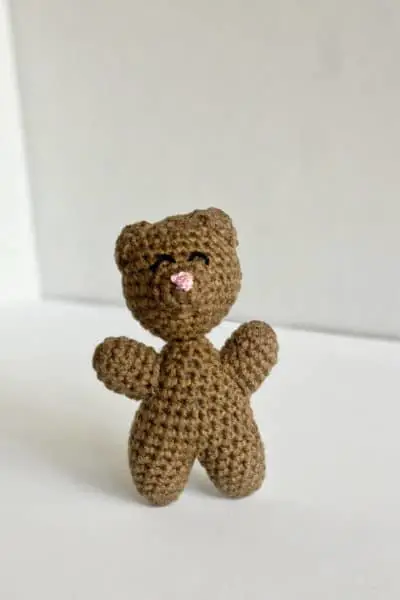
When finished, Gina measures 5.5 inches tall, 4 inches wide and 2.5 inches front to back. Gauge doesn’t really matter, but if you want exactly these measurements, it’s 3.5 stitches and 4 rows in 1 inch.
Abbreviations used:
ch chain
dec decrease
inc increase
Rd round
rep repeat
sc single crochet
Additional pattern notes:
[] denote a group of stitches that repeats as many times as directed
Gina is worked in the spiral round. First you will work her two legs, but DO NOT fasten off the second leg! You will join the first leg and continue to work the body without fastening off (which means less sewing!). The body will then go to the head, also without seaming. This is your first major piece.
Legs/Body/Head
Using your worsted weight yarn, you will start with a magic ring and chain 1, then single crochet 6.
Continue working in a spiral as follows, being sure to mark your first stitch of each new round with your stitch marker:
Rd 2: inc 6 (12)
Rds 3-6: sc 12 (12)
At this point, fasten off the first leg and weave in ends. Repeat Rds 1-6 for the second leg, but DO NOT fasten off the second leg.
Weave in starting end for both legs. The ending end of the first leg can either be woven in or crocheted over in the next round.
Continue as follows:
Rd 7: sc 6 on first leg, beginning in first stitch of the last round of the first leg, sc 12, sc 6 on second leg (24)
Rds 8-10: sc 24 (24)
Rd 11: [sc 2, dec], rep [] five more times (18)
Rds 12-13: sc 18 (18)
At this point, you will need to stuff your legs with fiber fill, being sure to stuff them firmly, but not over stuff to where the stitches are pulled too tightly and the fiber fill is spilling out.
Rd 14: [sc, dec], rep [] five more times (12)
Rd 15: sc 12 (12)
Now is the time to stuff the rest of the body with fiber fill
Rd 16: dec 6 (6)
Rd 17: sc 6 (6)
Rd 18: inc 6 (12)
Rd 19: [sc, inc], rep [] five more times (18)
Rd 20: [sc 2, inc], rep [] five more times (24)
Rd 21: [sc 3, inc], rep [] five more times (30)
Rds 22-23: sc 30 (30)
If you will be using safety eyes, add them in row 23 in stitches 15 and 18.
Rd 24: [sc 3, dec], rep [] five more times (24)
Rds 25-26: sc 24 (24)
Rd 27: [sc 2, dec], rep [] five more times (18)
Rd 28: [sc, dec], rep [] five more times (12)
Stuff the head with fiber fill, making sure to add some extra fiber fill and stuff it firmly into the neck space. I often use the end of my crochet hook, but a stuffing tool or the eraser end of a pencil would also work here.
Rd 29: dec 6 (6)
Fasten off and leave a 6 inch tail. Sew the tail through the front loop on all 6 scs and pull tight. Weave in the remaining end.
Arms
The next pieces to work are the arms. Be sure to make 2!
Still using your worsted weight yarn, you will start again with a magic ring and chain 1, then single crochet 6.
Continue working in a spiral as follows, being sure to mark your first stitch of each new round with your stitch marker:
Rd 2: inc 6 (12)
Rd 3: sc 12 (12)
Rd 4: [sc 2, dec], rep [] twice more (9)
Rds 5-6: sc 9 (9)
Fasten off and leave a 6 inch tail to sew onto the body. Stuff each arm firmly with fiber fill.
Muzzle
Still using your worsted weight yarn, you will start again with a magic ring and chain 1, then single crochet 5. Please note that this is different from how most other pieces start!!
Continue working in a spiral and work an increase into each single crochet (for a total of 10 stitches in this round).
Fasten off and leave a 6 inch tail to sew onto the body.
Ears
Again, be sure you make 2!
Still using your worsted weight yarn, you will start again with a magic ring and chain 1, then single crochet 6.
Continue working in a spiral and work an increase into each single crochet (for a total of 12 stitches in this round).
Fasten off, weave in beginning end and leave a 6 inch tail to sew onto the head.
Tail
Still using your worsted weight yarn, you will start again with a magic ring and chain 1, then single crochet 6.
Continue working in a spiral as follows, being sure to mark your first stitch of each new round with your stitch marker:
Rd 2: [sc, inc], rep [] two more times (9)
Rd 3: [sc, dec], rep [] two more times (6)
Fasten off and leave a 6-8 inch tail for sewing onto the body and weaving in the end. Weave in your starting end.
Nose
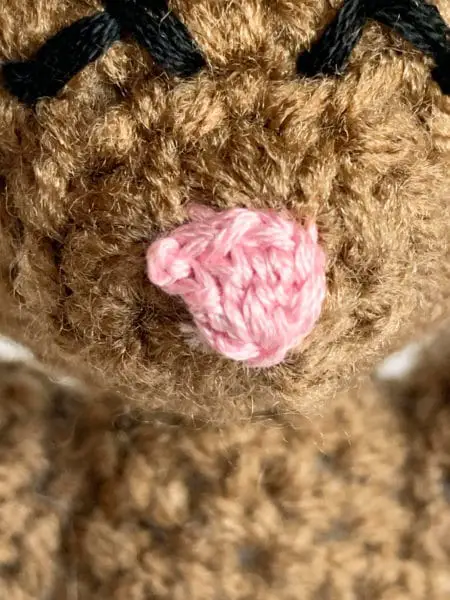
Using a pink embroidery thread, you will now make the nose to go onto the muzzle.
Start with a magic ring, and chain 3, then double crochet 3.
Fasten off and pull the magic ring as tight as possible, putting a knot in the thread to keep it tight. Leave a 6 inch tail to sew onto the muzzle.
Eyes
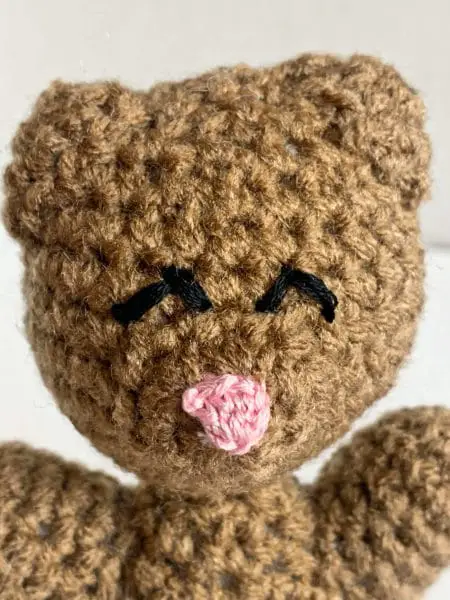
If you are using safety eyes, be sure you insert them where noted in the Legs/Body/Head section above. If you need another eye solution, check out my Crochet Eyes for Amigurumi post!
In the pictures, I used the closed embroidery thread eye I talked about in that post.
Assembly
Sew the arms onto the body from row 11 to row 14, straight on the side of the body.
Press the ears flat and sew them onto the head. I start in the second row from the end and work my way down the head, keeping the ears running to the sides.
Stuff the muzzle with a small amount of fiber fill and sew onto the head, in the middle of the face from row 18 to row 22.
If applicable, sew eyes onto the head, from row 22 to row 24, centered around the muzzle with two stitches between the eyes when eyes are sewn on.
Sew the nose onto the muzzle with the bottom tip of the nose in the center of the magic ring of the muzzle.
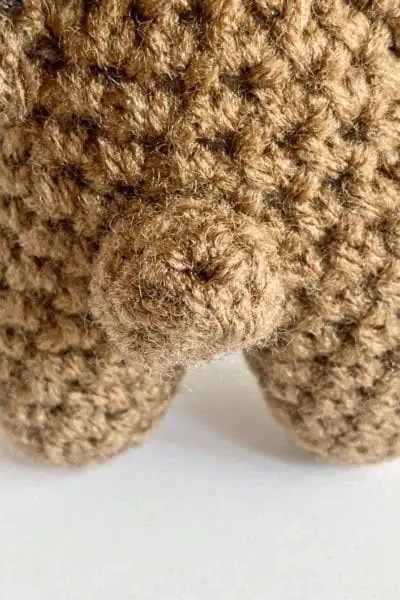
Stuff the tail with a small amount of fiber fill and sew onto the body, centered on the back from row 8 to row 11.
And now you have Gina, your very own pocket gopher! Want another project like this one? Check out Leo the Beaver or the other Woodland Critters!
Like this project? Pin it for later!