
Contents
Hi everyone!
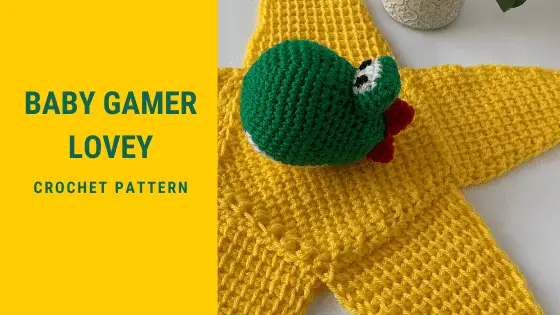
Another Friday, another new pattern. This week, it’s the Baby Gamer Lovey.
Did you enjoy playing Super Mario Bros when you were a kid? Or maybe you enjoy it now? Or know someone who does? And do you (or the people you know) have a baby in need of a beautiful handmade gift?
Then this pattern is for you!
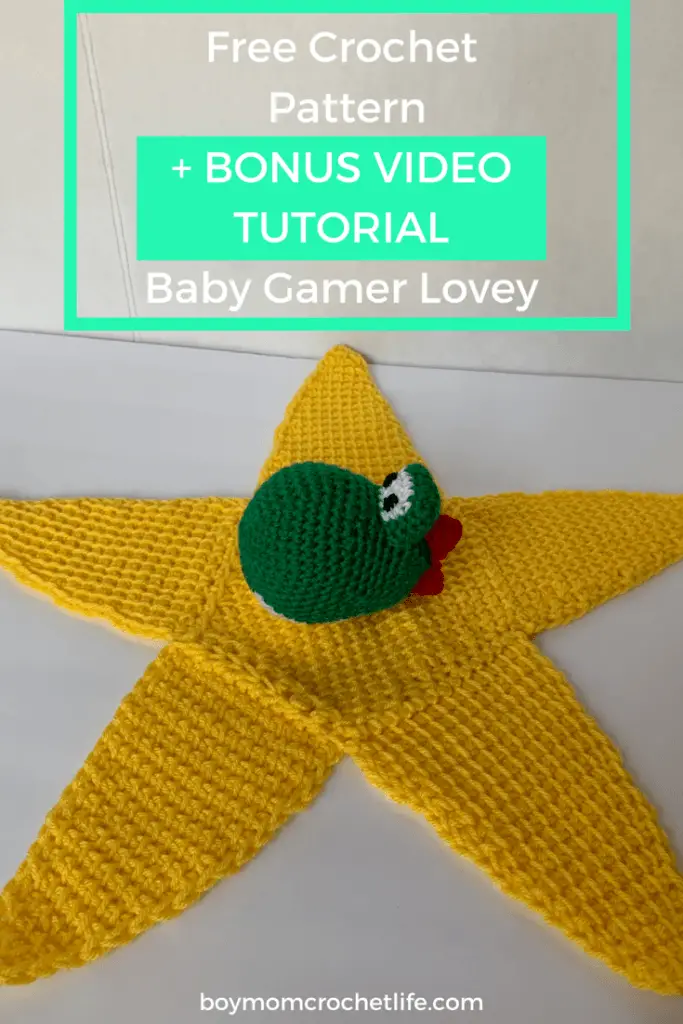
The Baby Gamer Lovey is made using Tunisian crochet for the star portion and in the regular amigurumi style for the attached dinosaur head.
Not sure about Tunisian crochet? Have no fear! I have some brand new Tunisian crochet tutorials for you, including one specific for this pattern!
The Baby Gamer Lovey works up pretty quickly, so if you’re in need for a quick weekend project for that baby shower you forgot you were going to (yep, been there!), this pattern will certainly fit the bill!
Some of the links in this article are “affiliate links”, a link with a special tracking code. This means if you click on an affiliate link and purchase the item, I will receive an affiliate commission- as an Amazon Associate, I earn from qualifying purchases. The price of the item is the same whether it is an affiliate link or not. Regardless, I only recommend products or services I believe will add value to you. I hope these links are as helpful as possible for you!
Baby Gamer Lovey Crochet Pattern
Skill Level
Easy to Intermediate
Yarn and Hook Size
115.5 yards (A) I Love This Yarn in Yellow (355 y/324.6 m per 7 oz/198.5 g skein); 100% acrylic, worsted weight (#4) yarn
32 yards (B) I Love This Yarn in Jelly Bean (355 y/324.6 m per 7 oz/198.5 g skein); 100% acrylic, worsted weight (#4) yarn
12 yards (C) I Love This Yarn in White (355 y/324.6 m per 7 oz/198.5 g skein); 100% acrylic, worsted weight (#4) yarn
4 yards (D)
1 yard (E) DMC Embroidery Floss in Black (8.7 y/8 m); 100% cotton
8.0 mm Tunisian crochet hook for lovey
4.5 mm crochet hook for amigurumi head
2.0 mm crochet hook for eyes
Notions
Note: As this is a baby lovey, I WOULD NOT use safety eyes on this project! If you need some suggestions for alternatives to safety eyes, check out my Crochet Eyes for Amigurumi post.
Measurements and Gauge
Lovey is 19” tall by 20” wide. Gauge is 7 sts and 6 rows is 2” x 2” for the pentagon portion and 7 sts and 5 rows is 2” x 2” for the triangles.
Head is 5” by 5”. Gauge is 8 sts and 8 rows is 2” x 2”.
Abbreviations
| ch(s) chain(s) | sl st slip stitch |
| dec decrease | st(s) stitch(es) |
| inc increase | TSS Tunisian simple stitch |
| MR magic ring | TSS2tog Tunisian simple stitch 2 together |
| rep repeat | TSS3tog Tunisian simple stitch 3 together |
| rd round | yo yarn over |
| sc single crochet |
() denote a group of stitches worked in the same stitch
[] denote a group of stitches that repeats as many times as directed
Instructions
Lovey

For a video tutorial of this portion, go here.
Triangle
(make 5)
This piece is worked in Tunisian crochet using a standard reverse pass of ch 1, yo pull through 2 until the end. Also remember that the first loop on the hook counts as a stitch for the end of row stitch counts.
Using A, ch 1
Row 1: inc, TSS (3)
Row 2: [inc, TSS], rep [] (5)
Row 3: 4 TSS (5)
Row 4: inc, 3 TSS, inc, TSS (7)
Row 5: 6 TSS (7)
Row 6: inc, 5 TSS, inc, TSS (9)
Row 7: 8 TSS (9)
Row 8: inc, 7 TSS, inc, TSS (11)
Rows 9 & 10: 10 TSS (11)
Row 11: inc, 9 TSS, inc, TSS (13)
Rows 12-14: 12 TSS (13)
Row 15: inc, 11 TSS, inc, TSS (15)
Rows 16-18: 14 TSS (15)
Row 19: sl st into each st to bind off (15)
Leave a 6”-8” tail for sewing and weaving in ends
Pentagon
(make one)
This piece is worked in Tunisian crochet using a standard reverse pass of ch 1, yo pull through 2 until the end. Also remember that the first loop on the hook counts as a stitch for the end of row stitch counts.
Using A, ch 14
Row 1: TSS 14 (15)
Row 2: TSS 14 (15)
Row 3: inc, TSS 13, inc, TSS (17)
Row 4: TSS 16 (17)
Row 5: inc, TSS 15, inc, TSS (19)
Row 6: TSS 18 (19)
Row 7: inc, TSS 17, inc, TSS (21)
Row 8: TSS 20 (21)
Row 9: inc, TSS 19, inc, TSS (23)
Row 10: TSS 22 (23)
Row 11: inc, TSS 21, inc, TSS (25)
Row 12: TSS 24 (25)
Row 13: inc, TSS 23, inc, TSS (27)
Row 14: TSS 26 (27)
Row 15: TSS3tog, TSS 19, TSS3tog, TSS (23)
Row 16: TSS3tog, TSS 15, TSS3tog, TSS (19)
Row 17: TSS3tog, TSS 11, TSS3tog, TSS (15)
Row 18: TSS3tog, TSS 7, TSS3tog, TSS (11)
Row 19: TSS3tog, TSS 3, TSS3tog, TSS (7)
Row 20: [TSS2tog, TSS], rep [] (5)
Row 21: TSS3tog, TSS (3)
Row 22: TSS2tog, yo and pull through 2
Dinosaur Head Amigurumi

Using B
Rd 1: 6 sc in MR (6)
Rd 2: [inc], rep [] 5 more times (12)
Rd 3: [sc, inc], rep [] 5 more times (18)
Rd 4: [sc 2, inc], rep [] 5 more times (24)
Rd 5: [sc 3, inc], rep [] 5 more times (30)
Rd 6: Using B: [sc 4, inc], rep []; Using C: [sc 4, inc], rep []; Using B: [sc 4, inc], rep[] (36)
Rd 7: Using B: [sc 5, inc], rep []; Using C: [sc 5, inc], rep []; Using B: [sc 5, inc], rep [] (42)
Rd 8: Using B: [sc 6, inc], rep []; Using C: [sc 6, inc], rep []; Using B: [sc 6, inc], rep [] (48)
Rds 9-11: Using B: sc 16; Using C: sc 16; Using B: sc 16 (48)
Rd 12: Using B: sc 1, dec, sc 1, dec, sc 10; Using C: sc 7, dec, sc 7; Using B: sc 10, dec, sc 1, dec, sc 1 (43)
Rd 13: Using B: [sc 5, dec], rep []; Using C: sc 7, dec, sc 7; Using B: sc 4, dec, sc 5, dec (38)
Rd 14: Using B: [sc 4, dec], rep []; Using C: [sc 5, dec], rep [], sc 1; Using B: sec 3, dec, sc 4, dec (32)
Rd 15: Using B: sc 10; Using C: sc 14; Using B: sc 8 (32)
Rd 16: Using B: sc 11; Using C: sc 12; Using B: sc 9 (32)
Rd 17: Using B: sc 13; Using C: sc 8; Using B: sc 11 (32) Drop C, leaving a tail to weave in
Rd 18: Using B: sc 14, dec, sc 2, dec, sc 12 (30)
Rd 19: [sc 3, dec], rep [] five more times (24)
Rd 20: [sc 2, dec], rep [] five more times (18)
Rd 21: [sc, dec], rep [] five more times (12)
Rd 22: dec 5 times (6)
Fasten off and use the tail to sew through each stitch and pull closed.
Dinosaur Eye bulge

Using B, ch 7
Rd 1: sc 5 in back bumps of ch, (sc 2) in final bump, sc 5 in opposite side of foundation ch, (sc 2) in final ch (14)
Rd 2: [sc 2, inc], rep [], sc 1, Using C: [sc 2, inc], rep [], Using B: sc 1 (18)
Rds 3 & 4: Using B: sc 9, Using C: sc 8, Using B: sc 1 (18)
Rd 5: Using B: sc 9
Fasten off. You want the back side to be longer than the front side so the eye bulge sits correctly on the head, so Rd 5 is only a half row.
Spikes

(make 2)
Using D
Rd 1: 6 sc in MR
Rd 2: [sc 2, inc], rep [] (8)
Rd 3: [sc 2, inc], rep [], sc 2 (10)
Pupils
(make 2)
Using E
Rd 1: sc 6 in MR. sl st to first sc
Fasten off, leaving 6” tail. Use tail to sew onto eye bulge and weave in end.
Assembly
Attach eye bulge and spikes to head and weave in ends.
Eye bulge was placed between the fourth and eighth rows from the end.
Attach triangles to pentagon and weave in ends.
Attach head to star and weave in ends.
As always, I would love to see your projects! You can tag me on Instagram (@boymomcrochetlife), upload to Ravelry, or comment here. And you can always email me directly at darcy@boymomcrochetlife.com!
