
Contents
Magic Rings, Working in the Round, Increases/Decreases, Working into the Sides of Stitches and Slip Stitches
Hi everyone! In this post we are going to cover a few topics that will take you from working on flat pieces to being able to work on 3-D pieces, so let’s get to it!
Magic Ring
The first thing you will often need to know when working on a 3-D piece, such as an amigurumi or stuffy-type toy, is how to make a magic ring.
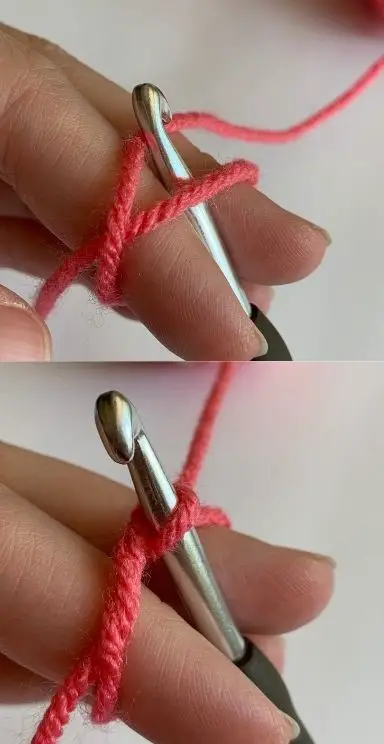
Take the yarn and instead of tying a slip knot in it, loop it over itself leaving a large enough loop that you can work into it.

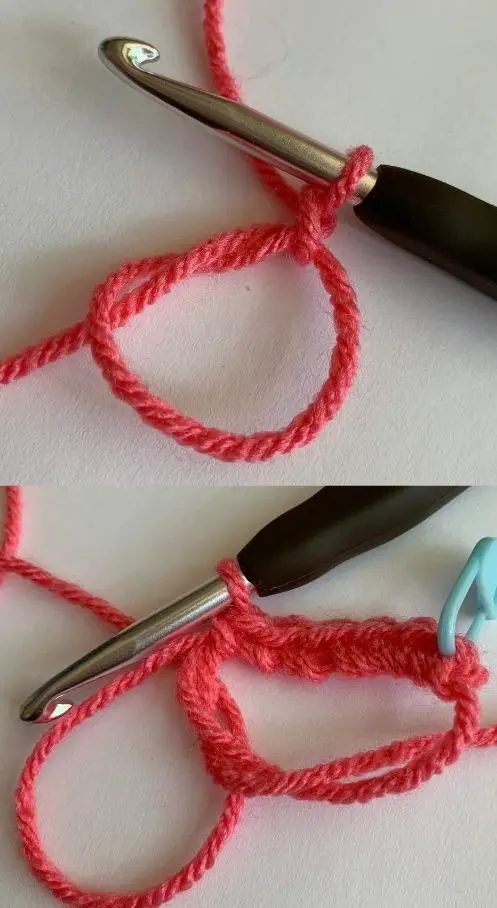
Insert your hook into the loop and grab the end of the working yarn and pull up a loop.
Chain 1 (if working sc, 2 if dc, and so on), and sc the amount specified in the pattern (often, this number is 6, so that is what we will use in this example).
Now, we are going to continue on with this piece by working in the round. When working in the round, you can either slip stitch and chain up at the end of each round, or work in a spiral.
Each has it’s own advantages and disadvantages. Slip stitching is easier to keep track of which round you are working on and keeps color changes in one stripe but also leaves a visible seam up the side, while working in a spiral often causes a jog in the color changes but has no seam.
For amigurumi patterns, you will mostly be working in a spiral.
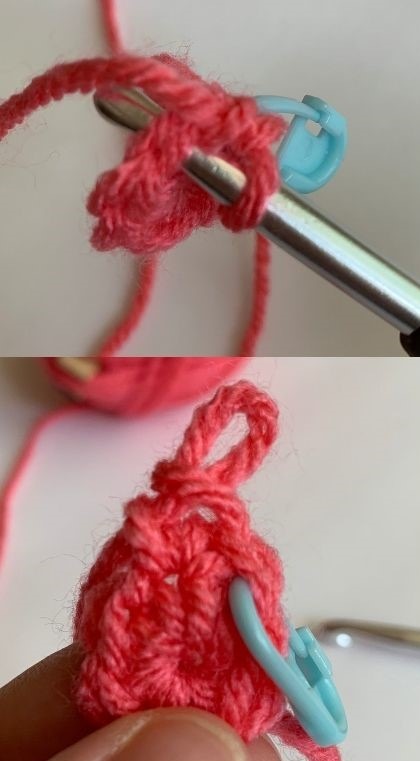
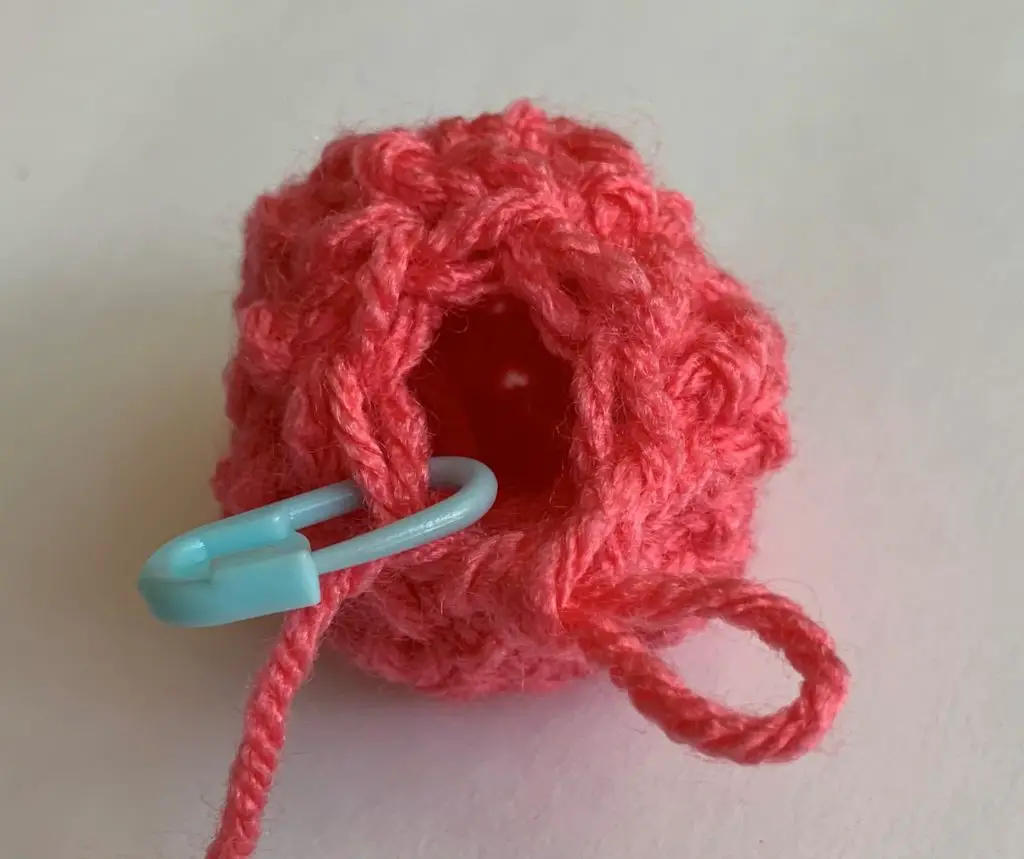
When working in a spiral, it is best to use a stitch marker to mark the first or last stitch in each round. I prefer to mark the first stitch so I can easily finish a round and then use my stitch marker to hold my working loop open when I have to take a break from working on my project, but it’s up to you on how you would prefer to do it.
So, back to our practice piece. Begin working into the first sc you made in the magic ring. Sc 1 and mark it with your stitch marker.

Increasing
Now, we are going to increase. All this means is you will work another single crochet into the same space.
To increase evenly, perform an increase on each stitch around (for the second round ONLY), so that you have 12 stitches at the end of the round. To practice your pattern reading, those instructions would look like this:
[(sc 2)] repeat five more times (12)

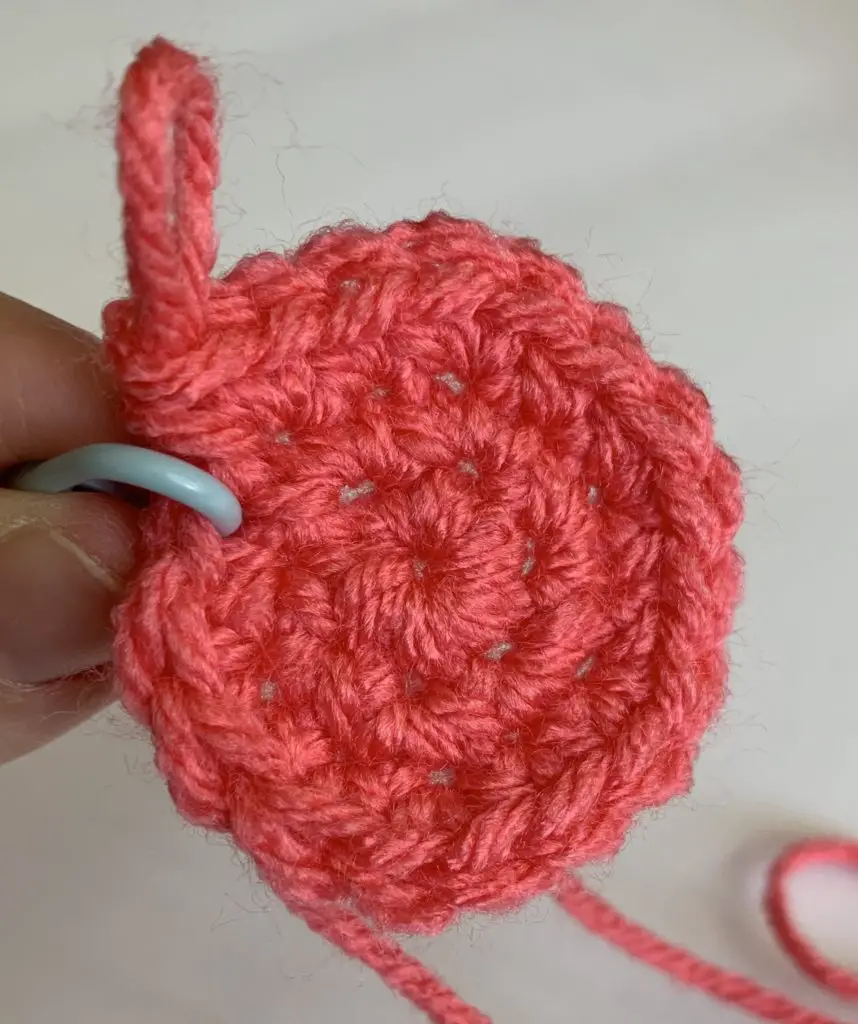
To evenly increase your circle into a sphere, you want to increase the number of stitches in each row by the number of stitches you worked into your magic ring; in this case, 6. Round three will have a single crochet followed by an increase, repeated around:
[Sc 1, (sc 2)] repeat five more times (18)
Let’s increase for one more round, remembering that the stitch count should increase by 6 to 24:
[Sc 2, (sc 2)] repeat five more times (24)
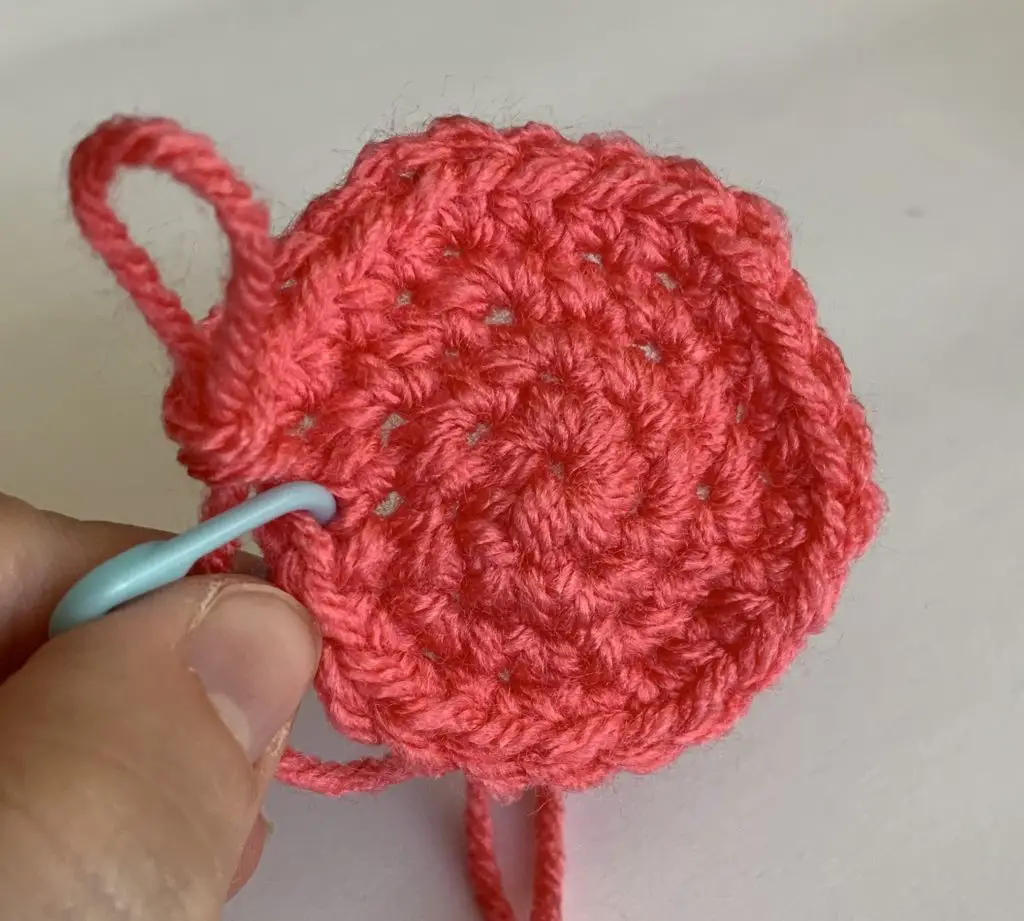
In case you’re having trouble reading that pattern language, you will single crochet into the first two stitches, then increase (or single crochet two into the same stitch) and repeat around five more times.
Decreasing
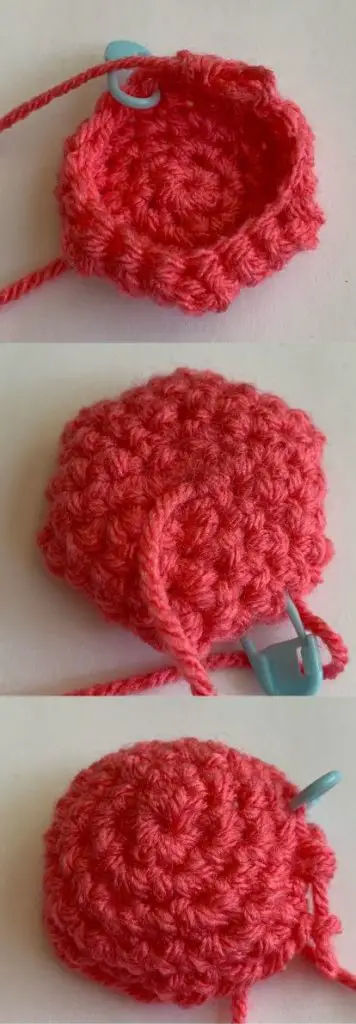
Now you should have a little half sphere, so you will begin decreasing down to make a complete sphere. The order of stitches will mirror the order you have been using to increase, but instead of an increase you will work a decrease.
A decrease is worked as insert your hook into the stitch, yarn over (yo) and pull up a loop, insert hook into next stitch, yo and pull up a loop, yo and pull through three loops on hook.

So our next round (Rd 5) will look like this:
[Sc 2, dec] repeat five more times (18)

When you begin decreasing, your project may try to turn the wrong way out. How can you tell? You want the side of the stitches you see while you’re working (the right side) to face you. If it isn’t, just turn the work out so it is.
Round 6 will mirror round 3, but instead of increases, you will be working decreases and it will end with 12 stitches:
[sc 1, dec] repeat five more times (12)

And Round 7 will mirror round 2, ending with 6 stitches:
[dec] repeat five more times (6); may also be written as “dec around (6)”
Now you are at 6 stitches. You probably could try to decrease more, but the easiest way to end at this point is to use your tapestry needle.
Stuff a little fiber fill or yarn end scraps into your sphere, cut the working yarn, leaving a tail of about 8 inches, and thread your tapestry needle onto it. Sew your needle through all 6 stitches through the front loop from the outside of the sphere to the inside as shown and pull tight.

Now you have a sphere! Weave in both ends (if your starting end is inside, as mine is, you will want to weave in before you have decreased too far to reach in) and you’re done!
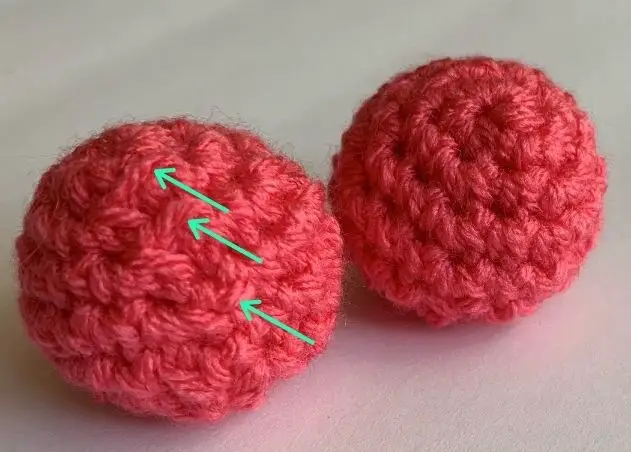
There is another method of decreasing called the invisible decrease. This option works very well on stuffed items, as the stuffing tends to stretch the stitches out and leave open spaces through which you can see the stuffing.

Note: I used the recommended hook size for this yarn (5.5 mm for worsted weight). Most amigurumi patterns call for a smaller hook than what is recommended for the yarn to help reduce the holes in the finished work. However, the invisible decrease can help reduce the hole size even further, especially when the pattern decreases quickly.
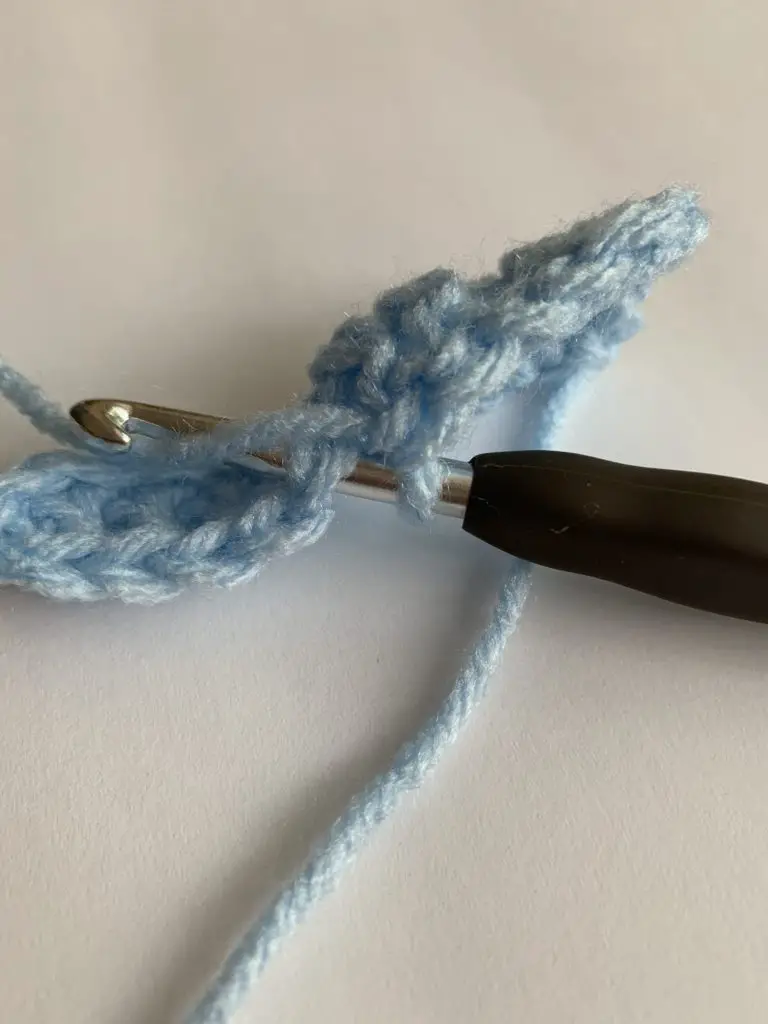
The only difference in an invisible decrease is that instead of working into both loops on the top of the stitch, you work only in the front loops (flo or front loops only will be how this is denoted in a pattern). The front loop is the loop closest to you.

Borders into the Sides of Stitches
Now to switch gears a little bit, we are going to talk about working into the sides of stitches. You may be saying to yourself, “Why would I want to do that?” Well, maybe you want to put a border on a blanket, washcloth, scarf, or any other item that you worked flat in rows to make it look a little more finished. Or maybe you want to add some ribbing to a hat.
Whatever the reason, here’s how to do it.
The hardest part of working into the sides of stitches for me was knowing how many stitches I should work into each one. The simplest way to think of it is how many “stitches” tall is the stitch you are working into? (Keep in mind that this isn’t strictly correct, in that the stitch heights don’t relate one to one with the widths, but it’s close enough to help you remember)
Say you are doing a single crochet border on a wash cloth made of single crochets. Put one single crochet into the side of each single crochet down each side.

Maybe you are doing a single crochet border on a double crochet blanket. Put two single crochets into each double crochet.

It doesn’t really matter what stitch you are using on the border, since all stitches are the same width. I used single crochet in the example because that is the most common stitch for borders or at least for the first round of a border, but you could do any stitch you want.
Slip Stitch
After learning all of these stitches, the slip stitch (sl st) will seem positively easy by comparison. This is a way to kind of skip a stitch but not leave a space in the project like a chain stitch does.

It is also a way to join your rounds when working in the round.

To make a sl st, insert hook into stitch, yo and pull through the stitch and the loop on your hook.
That’s it!
Now you can take your newfound skills and create all kinds of amazing things! Need some amigurumi inspiration? Try my Sleepy Time Truck (free!) crochet pattern!