
Contents
If you’re looking for a crochet pickup truck pattern, you’re in the right place! Read on!
Hi everyone! Today, I am so excited to be bringing you my very first self-designed (and totally free) crochet pattern!
As you may know, I am a mom to two boys. One of these boys, C, loves to cram as much stuff into his bed with him as possible; stuffed animals, books, even hard plastic toys, specifically trucks. I have no idea how he sleeps comfortably with all of that stuff (and maybe he doesn’t and that’s why he used to wake up so often…), but we are also at the point where I want to limit the amount of loud things that can fall out of his bed and wake B.
I searched Ravelry and there are some super cute crochet truck patterns there (check out this post for some of my favorites!), but nothing was really quite what I wanted.
My boys both love their dad’s truck and get so excited every night when they see him pull in, so it made sense to me to try to make something that looked similar to his truck.
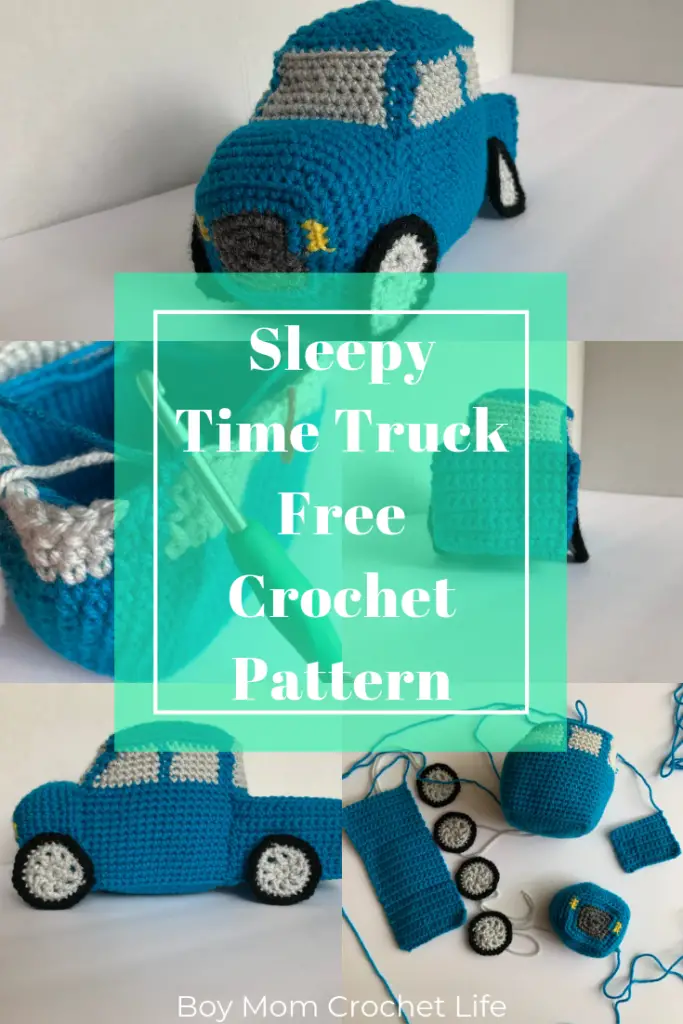
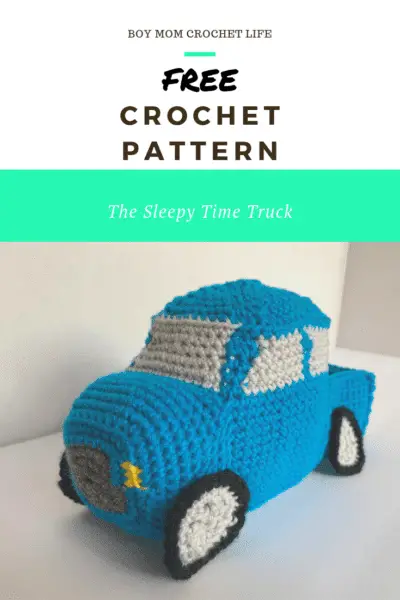
Enter the Sleepy Time Truck crochet pattern! I was super intimidated to try designing a pattern, but like you, I will do anything for my kids. And it was a success! Both C and B love it, so I better make another one soon (or something else fun for B!).
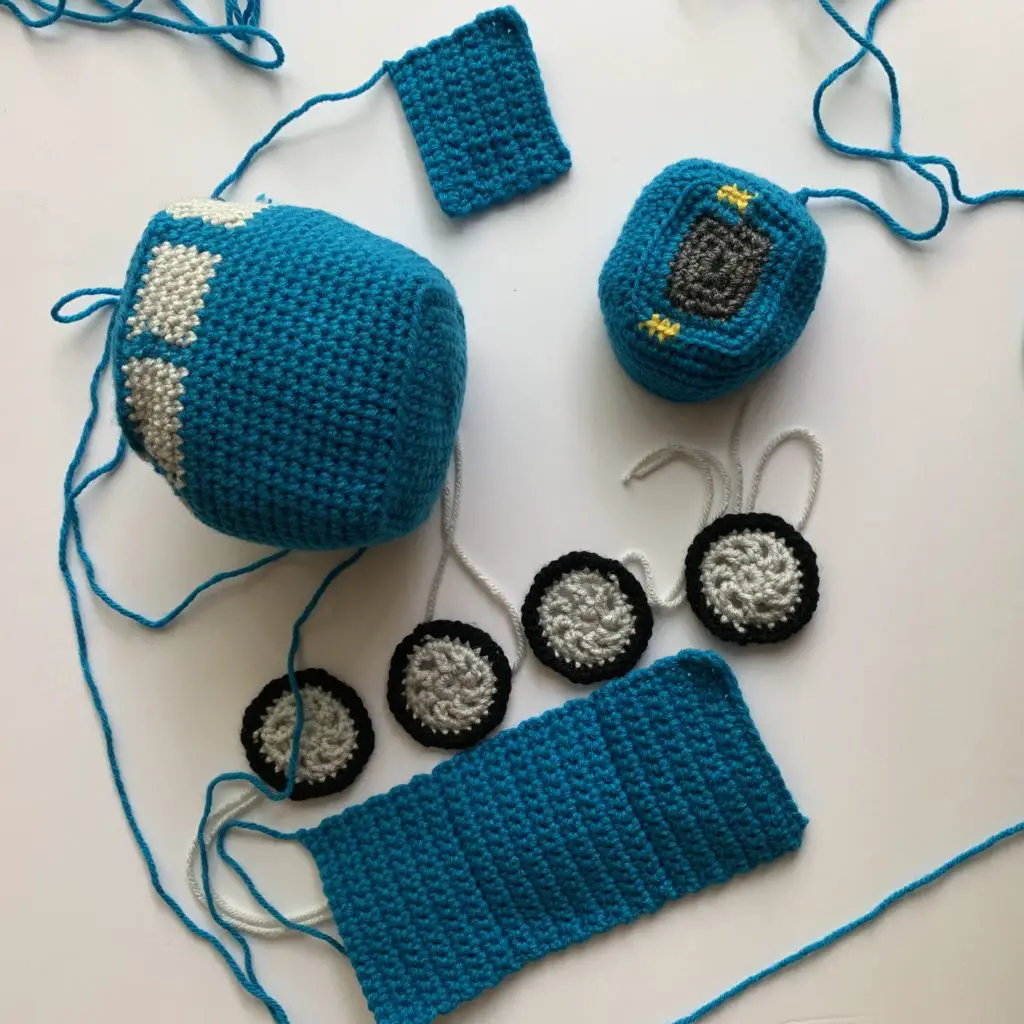
Worked with your favorite type and color of worsted weight yarn, this truck will be sure to keep your little one happy for hours and hours!
Update: It’s been almost 10 months since I made this truck and both boys still love it! C will sometimes share it with B and let him sleep with it, but if C has it, he’s usually playing with it in his room instead of taking his nap. At least it’s quieter than a plastic truck!
Now it’s your turn! If you make your own Sleepy Time Truck using my pattern, please tag me, comment here or email me. I’d love to see it!
Some of the links in this article are “affiliate links”, a link with a special tracking code. This means if you click on an affiliate link and purchase the item, I will receive an affiliate commission. The price of the item is the same whether it is an affiliate link or not. Regardless, I only recommend products or services I believe will add value to you. I hope these links are as helpful as possible for you!
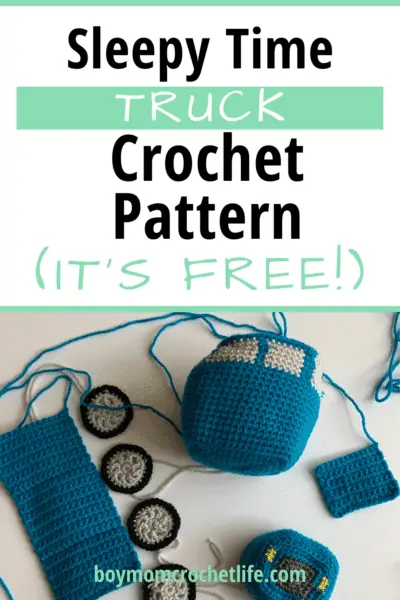
Sleepy Time Truck Crochet Pattern
Skill Level
Easy to Intermediate (there are some instructions that can be difficult to understand, but there is a video linked to help explain)
Yarn and Hook Size
4.5 mm (G7) hook, or whatever hook needed to obtain gauge
- 140 yards Main Color (MC):
Loops and Threads Impeccable in Bright Sky Blue (285 y/260 m per 4.5 oz/127.5 g skein); 100% acrylic, worsted weight (#4) yarn
- 27.5 yards Contrasting Color 1 (CC1): I Love This Yarn in Light Gray (355 y/324.6 m per 7 oz/198.5 g skein); 100% acrylic, worsted weight (#4) yarn
- 7 yards Contrasting Color 2 (CC2): I Love This Yarn in Black (355 y/324.6 m per 7 oz/198.5 g skein); 100% acrylic, worsted weight (#4) yarn
- 3.5 yards Contrasting Color 3 (CC3): Red Heart Super Saver in Grey Heather (364 y/333 m per 7 oz/198.5 g skein); 100% acrylic, worsted weight (#4) yarn
- .5 yard Contrasting Color 4 (CC4): I Love This Yarn in Yellow (355 y/324.6 m per 7 oz/198.5 g skein); 100% acrylic, worsted weight (#4) yarn
Note: This pattern can be worked in whatever yarn size/hook size combination you would like. Just ensure that your hook is sized down at least 2 sizes (at least 1 mm) from what the yarn recommends. Yarn amounts and finished dimensions will vary from those listed if different yarn/hook sizes are used.
Notions
Finished Dimensions and Gauge
8 stitches and 9 rows of single crochet equals 2 square inches. Finished dimensions are 5.5” x 10.5” x 4.5” (14cm x 26.7cm x 11.4cm).
Abbreviations
This pattern is written using US terms
| beg beginning | rd round |
| blo back loop only | sc single crochet |
| ch chain stitch | sc3tog single crochet 3 together |
| dec decrease | sl st slip stitch |
| dc double crochet | sm stitch marker |
| flo front loop only | st(s) stitch(es) |
| inc increase | yo yarn over |
| rep repeat |
- () denote a group of stitches worked in the same stitch
- [] denote a group of stitches that repeats as many times as directed
- (number) at the end of each row of instructions shows the total number of stitches for that row/round
- Special stitch: sc3tog is worked as insert hook into first st, yo, pull up a loop; insert hook into second st, yo, pull up a loop; insert hook into third st, yo, pull up a loop; yo, pull through 4 loops on hook
Instructions
This item is worked in pieces and assembled at the end. Some pieces are worked in the round and some are worked in rows; the method used will be noted for each piece.
Chains do not count as a stitch unless noted.
Hood
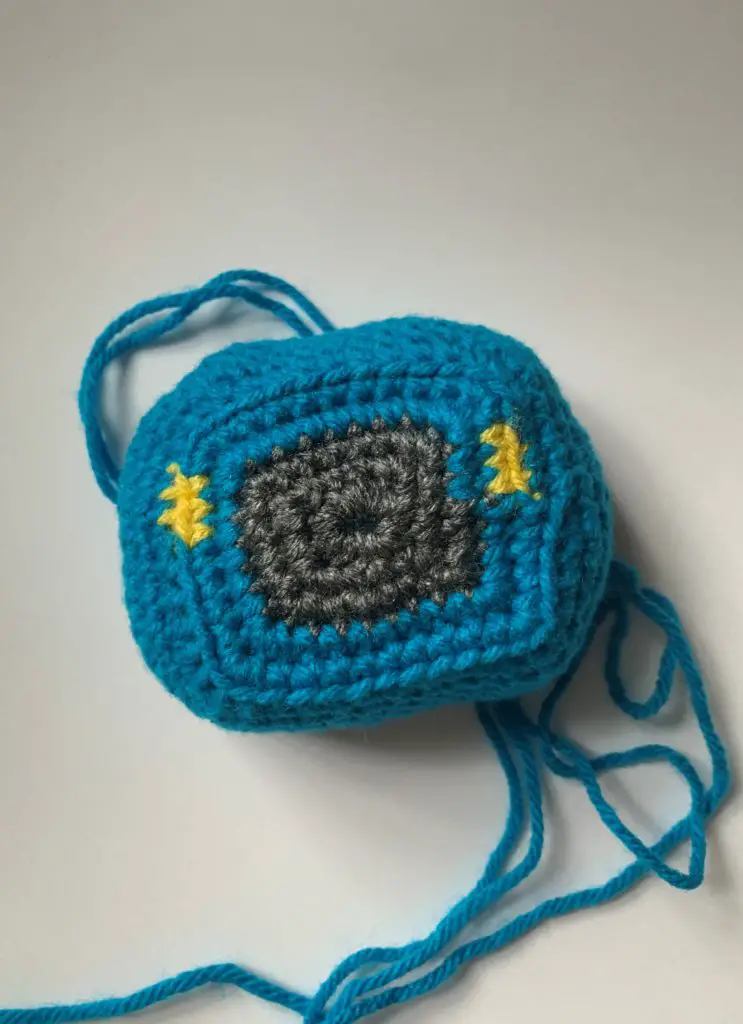
This portion is worked in the round.
Rd 1: Using CC3, sc 12 in magic ring. Insert sm into first st and continue to move throughout (12)
Rd 2: [(sc 3), sc 3, (sc 3), sc 1] rep once (20)
Rd 3: sc 1 [(sc 3), sc 5, (sc 3)], sc 3, rep [] once, sc 2 (28)
Switch to MC
Rd 4: sc 2, [(sc 3), sc 7, (sc 3)], sc 5, rep [] once, sc 3 (36)
Switch to CC4
Rd 5: sc 3, switch to MC, (sc 3), sc 9, (sc 3), switch to CC4, sc 3, switch to MC, sc 4, (sc 3), sc 9, (sc 3), sc 4 (44)
Rd 6: Working in blo, sc 6, ch 1, sc 9, ch 1, sc 29 (46)
Rd 7: sc 6 (sc 2), sc 9, (sc2), sc 29 (48)
Rds 8-13: sc 1 in each st around (48). Fasten off after row 13 and leave a 10” long tail for sewing. Weave in all other ends.
Cab
This portion is worked in the round.
Rd1: Using MC, sc 10 in magic ring (10)
Rd 2: [(sc 3), sc 2, (sc 3), sc 1] rep [] once (18)
Rd 3: sc 1, [(sc 3), sc 4, (sc 3)], sc 3, rep [] once, sc 2 (26)
Rd 4: sc 2, [(sc 3), sc 6, (sc 3)], sc 5, rep [] once, sc 3 (34)
Rd 5: sc 3, [(sc 3), sc 8, (sc 3)], sc 7, rep [] once, sc 4 (42)
Rd 6: sc 4, [(sc 3), sc 10, (sc 3)] sc 9, rep [] once, sc 5 (50)
Rd 7: sc 5, [(sc 3), sc 12, (sc 3)] sc 11, rep [] once, sc 6 (58)
Rd 8: sc 6, [(sc 3), sc 14, (sc 3)] sc 13, rep [] once, sc 7 (66)
Rd 9: Working in blo, sc 1 in each st around (66)
Rd 10-21: sc 1 in each st around (66)
Note: At this point, weave in the end from your magic ring before your cab is worked up too high to easily reach in and do so.
Note: This next part is where we are making the windshields and windows. In order to do this, you will switch between CC1 and the MC. To minimize weaving in ends, I floated the unused colors on the inside of the cab. Make sure to keep your floats loose enough that they aren’t affecting the structure of the cab, but not so loose that they tangle up with your working yarn. If you have never worked with floats before, I would suggest carrying the yarn in your stitches, as in tapestry crochet. LINK
Rd 22: Beginning with CC1 sc 9; MC sc 2; CC1 sc 6; MC sc 1; CC1 sc 8; MC sc 2; CC1 sc 14; MC sc 2; CC1 sc 8; MC sc 1; CC1 sc 6; MC sc 2; CC1 sc 5 (66)
Rd 23: CC1 sc 9; MC sc 2; CC1 sc 6; MC sc 1; CC1 sc 6, dec; MC sc 2; CC1 dec, sc 10, dec; MC sc 2; CC1 dec, sc 6; MC sc 1; CC1 sc 6; MC sc 2; CC1 sc 5 (62)
Rd 24: CC1 sc 9; MC sc 2; CC1 sc 6; MC sc 1; CC1 sc 5, dec; MC sc 2; CC1 dec, sc 8, dec; MC sc 2; CC1 dec, sc 5; MC sc 1; CC1 sc 6; MC sc 2; CC1 sc 5 (58)
Note: In order to keep the color changes from leaning too much, this round has some unique increases and decreases. Pay close attention to which stitches occur in the same stitch: dec in MC begin in same st as final st in CC1 and next st begs in same st as the last leg of the MC dec.
Rd 25: CC1 sc 1, dec, sc 6, (sc 1, MC dec), (MC dec leg 2, sc 1)
CC1 sc 6, (sc 1, MC dec), (MC dec leg 2, CC1 sc 1)
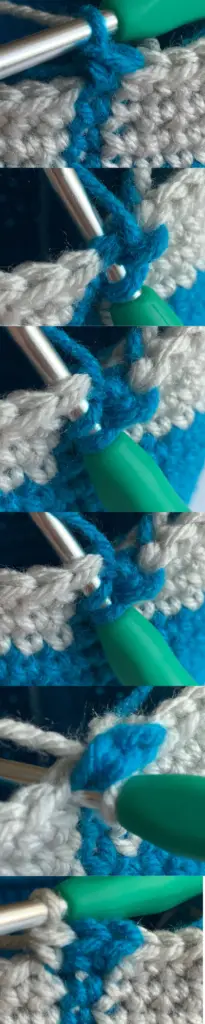
CC1 sc 3, dec, (in flo sc 1, MC dec), (in flo MC dec leg 2, sc 1), CC1 sc 4, dec, sc 4, (in flo sc 1, MC dec), (in flo MC dec leg 2, sc 1), CC1 dec, sc 4, (sc 1, MC dec), (MC dec leg 2, CC1 sc 1), CC1 5 gray, (sc 1, MC dec), (MC dec leg 2, sc 1), CC1 sc 5 (60)
Rd 26: CC1 sc 9, MC sc 2, CC1 sc 7, MC sc 1, CC1 sc 4, dec, MC sc 2, CC1 sc 10, MC sc 2, CC1 dec, sc 4, MC sc 1, CC1 sc 7, MC sc 2, CC1 sc 5 (58) Note: Your colors will overlap at the color changes by 1 stitch in order to straighten everything out.
Rd 27: CC1 sc 9, MC sc 17, CC1 sc 10, MC sc 17, CC1 sc 5 (58)
Break off gray, leaving 6 inch tail for weaving in.
Rd 28: MC, sc around in BLO (58)
Rd 29: sc 7, dec, sc 1, dec, sc 10, dec, sc 1, dec, sc 7, dec, sc 1, dec, sc 10, dec, sc 1, dec, sc 4 (50)
Rd 30: sc 6, dec, sc 1, dec, sc 8, dec, sc 1, dec, sc 5, dec, sc 1, dec, sc 8, dec, sc 1, dec, sc 3 (42)
Rd 31: sc3tog, sc 2, dec, sc 1, dec, sc 6, dec, sc 1, dec, sc 3, dec, sc 1, dec, sc 6, dec, sc 1, dec, sc 2 (32)
Rd 32: dec, sc 1, dec, sc 1, dec, sc 3, dec, sc 1, dec, sc 2, dec, sc 1, dec, sc 3, dec, sc 1, dec, sc 1 (23)
Rd 33: sc 1, dec, sc 1, dec, sc 1, dec, sc 1, dec, dec, sc 1, dec, sc 1, dec, sc 1, dec
Rd 34: [dec] rep six more times, dec in final stitch from Rd 33 and first stitch from Rd 34 (8 total, but 7 when you count at the end)
Fasten off and leave a 10”-12” long tail for sewing. Using your tapestry needle, see through the front loop of each stitch around and pull tight. Weave in ends.
Bed
The bed of the truck includes both sides and the bottom of the truck. You will fold it along the sc blo rows, with rows 1-11 being one side, rows 12-25 being the bottom and rows 26-35 being the other side.
This portion is worked in rows.
Ch 16
Row 1: Working into the back bump of the chain, starting in the second ch from the hook, sc 15, ch 1 and turn (15)
Rows 2-11: sc 15, ch 1 and turn (15)
Row 12: sc 15 in blo, ch 1 and turn (15)
Rows 13-25: sc 15, ch 1 and turn (15)
Row 26: sc 15 in blo, ch 1 and turn (15)
Rows 27-35: sc 15, ch 1 and turn (15)
Row 36: sc 15 across and fasten off (15), leaving 10” long tail for sewing. Weave in starting end.
Tailgate
This portion is worked in rows.
Ch 13
Row 1: Working into the back bump of the chain, starting in the second ch from the hook, sc 12, ch 1 and turn (12)
Rows 2-9: sc 12, ch 1 and turn (12)
Row 10: sc 12 and fasten off (12), leaving 8” long tail for sewing. Weave in starting end.
Wheels
This portion is worked in the round. Make 4.
Rd 1: Using CC1, sc 8 into magic ring, sl st into first sc (8)
Rd 2: Ch 4 (counts as a dc, ch 1), [(dc, ch 1)] rep [ ] six more times, sl st into 3rd ch of ch 4 (16)
Rd 3: ch 1, sc into same space, [(sc 2) in each ch 1 space, sc 1] rep [ ] six more times, (sc 2), sl st into first sc (24)
Switch to CC2
Rd 4: ch 1, sc1 in same space, sc 1, inc, [sc 2, sc inc] rep [ ]
six more times, sl st into first sc (32). Weave in ends except for beginning
end which you will use to sew the wheels on.
Assembly Instructions
Sew hood to cab
Determine the 16 stitches for the top of the hood. Using stitch markers, attach the top corners to the windshield post corners on the cab. Make sure that there is an even number of stitches on both sides (it should be 9 on each side) and secure the bottom corners together. Begin stitching together, removing stitch markers when reached.
Sew bed to cab
Line up the bed sides to the back-windshield posts immediately below the windshield stitches. Line up bottom corners together and secure. Sew bed to cab.
Sew tailgate to bed
Place tailgate in open space on end of bed and sew in
Sew wheels to truck
Determine where you want to place your wheels and sew on using the starting end.
Like this pattern? Pin it for later!

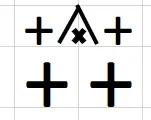
I’m having difficulty with rnd 25. This leg thing. Please explain it better. I’m left handed so the pics r not helping
Sure! Sorry, it is kind of confusing. So the first part of the decrease is going to be in the same stitch as the last single crochet you made. The second part of the decrease is also going to have a regular stitch in it, so over two stitches from the previous round, you will actually have three stitches in the current round. I’m going to add a chart that shows this a little more clearly into the post. It shows the two stitches from the previous round on bottom and the stitch, decrease, stitch that go into them. Does that help?
I’m also having difficulty with and 25. I’ve reworked this round about four times and I can’t seem to get it right. Is there a video tutorial on how to do the parts in parenthesis?
I am so sorry it has taken me so long to reply to you but I have added a video tutorial for this part. I really hope this helps and that you’re able to finish your truck quickly!
I have been stuck on end 25, what is the leg and also when I do ( sc1, Mc) Mc, dec, I can’t understand I am just stuck even after watching over and over.
Hi Marilyn,
I’m so sorry you’re having trouble! I think the best way that I can explain it is to just think of two stitches that you will be working into. The first stitch will have a single crochet in the contrasting color 1. Then, you will change to the main color and decrease the same stitch you just single crocheted into with the next stitch. Then you will change back to the contrasting color 1 and put a single crochet in the last stitch of the decrease. So each of these two stitches should have a single crochet and half of the decrease in it- three stitches in the current round (25) in two stitches from round 24.
When I say the “leg” of the decrease, I just mean one of the stitches that I am decreasing.
But thank you for letting me know you’re having trouble with this! I hope this helps and if not, please feel free to email me at darcy@boymomcrochetlife.com so I can respond to you more quickly (I know how frustrating it is when you’re hard at work and want an answer to your question like, yesterday!). And if it helps, I have this on my list of patterns to take a look at in the new year so that hopefully I can rewrite it to be much clearer and easier to work!
Darcy
Thank you so much for replying and thank you so much for sharing your pattern. I think your explanation will help, I had gotten so fustrated that I tore it apart but now I can try again. Thank you so much there is not another vehicle I like, been dying to try this one. Thanks again and if I can’t do it I’ll be asking for help again because I have to make it for a little one I adore. Thanks
I’ve got my pieces done, but there are no instructions for te sides of the bed of the truck.
Lois Prejean
vlasta.rb@gmail.com
Hi Lois,
The bed of the truck portion is actually the sides and the bottom of the bed. It should fold up at the rows that were back loop only single crochets so that the beginning and end of the piece are the two sides and the middle of it is the bottom part of the bed. I also updated the instructions to explain how it works better. Please let me know if that helps or if you need some more clarification!
I struggled with the legs but continued on. I make “creature comforts” for the local hospital / clinics. Security hands them out to little ones having surgery and procedures. I try to make some that might be more interesting to little boys. While it did not look as proportioned and jog free as yours you could tell it was a truck. I needed to make some logs to give the bed some stability. I single crochet flat for 10 rows then rolled them up and slip stitched.
I can’t wait to start this cute truck. Elaine